/ How-To
Photobook Designer – Tips of the Trade
By Colin on
Friday, 22nd March |
18 Comments
Our Photobook Designer software has tons to offer any intermediate to experienced photo book designer.
DID YOU KNOW….
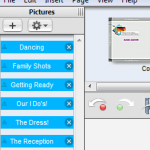
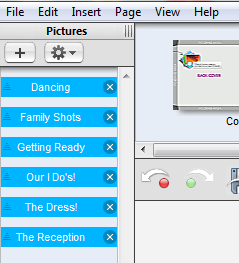
The Photobook Designer software allows you to sort your photos by folder name. After you’ve uploaded your images to the software, locate the Pictures toolbar on the left hand side of the software, and then click on the Manage Pictures button > Categorize > By Folder Name. Your photos will be organized in their respective folders and sorted with a blue bar showing each folder name. This can be particularly helpful when creating projects with hundreds of photos such as wedding books or family history books.
*Additional tip: You can also collapse the blue folder bars to work on one folder at a time and avoid being overwhelmed by too many images.
You can create your very own custom designed Page Styles. The software showcases dozens of page styles but you’ve also have the option to create your own page style, save it and use it again!
After you have designed your custom Page Style, go to the lower toolbar and click on the Page Styles tab. After you have done that, click on the button in the lower right hand corner (that looks like a gear). From there, you will see three different options; Save Left Page as Page Style/Save Right Page as Page Style/Save Spread as Page Style. Choose the one that suits you best and name it accordingly. Your custom Page Style is now saved!

Adding a Drop Shadow to your photos can really give your photo book a modern and three dimensional vibe. To add a Drop Shadow, select the photo and go to the Inspector toolbar on the right hand side of the software. Under the first tab on the left you will see a Drop Shadow section. You will be able to adjust the settings as you see fit. Pay close special attention to the Offset and Opacity settings as this can really make or break your book design.

Until next time, happy bookmaking!

18 Responses to “Photobook Designer – Tips of the Trade”


when I open an existing project all my photos are gone from the left navigation bar. The photos show on the pages but all are blurry and have a red triangle in the center. I have to reload all the photos to the navigation bar and then click & drag every photo to its place on the page. This is extremely frustrating! What can I do so I can just open my project and pick up wherre I left off?
Hi Virginia. For problems such as these, please email our support staff and they will be able to help you out shortly. Thanks!
is there any ‘bring to back’ or ‘bring forward’ button for the photos/objects that i just didn’t find in the program?
Hi Joy! There sure is! Just right click on the photo in question and go to Arrange > Bring to Back/Bring to Front. Hope that helps!
I second Peter’s comment! I just clicked through 92 pages to change the frame color/size & text color. Global changes make it to try out different looks till the book is just right!
Hi Laurie. Thanks for your feedback and suggestions also. We will hopefully be able to add/work on a feature like this shortly!
Thanks for the tips. I didn’t know about sorting by folder name. That will make things a lot easier. Thank you, also, for such a great product. I have made a number of books – some for myself, and some for gifts. The recipients are always thrilled with their books.
We’re glad we could help! Stay tuned for more great tips in future blog posts! If you want to know about a specific feature or have a question, email us and let us know. Perhaps we will feature your question in an upcoming post!
I agree – let us set global preferences for borders, background, fonts etc… And let us make a change to the settings to a page or a layout or the whole book at one time. I also want to be able to move a page at a time or insert between the left and right pages of a layout. I end up copying a wlole page and pasting to move half a layout.
Hi Ann. I have let the team know and hopefully they will be able to integrate something like this in an upcoming update in the software. Thanks for your feedback!
I fully agree! When making large books and wanting a consistent look it is time consuming and frustrating. Hopefully the changes can happen soon, before my next book
Hi Lindsey! We will definitely work on something like this for our customers! Thanks for your feedback!
WOW–I love the idea of folders to categorize the photos! I wish I had known that 3 books ago!! I guess I did not play around enough with the options before I started working. Now I will investigate more to see what else is available.
I love your books!!
Hi Diane! We will be setting up more blog posts about cool, insider tips and tricks in the future, so keep an eye out! If you figure out any neat tips, feel free to email us and share them with us for a chance to be featured on our next blog post. Thanks for your support and happy book making!
I’m having trouble when I am making my own page designs. When I want to change the numbers
of the size of the picture, I put my cursor over the existing number but it seldom allows me to insert a new dimension before I click many many times. It’s very frustrating and is extending the time it should take to do this. I didn’t have this problem on your old site when I created several books, but with your new download (which should be improved, not worse), I’m having this problem. Please help.
Hi Betsy. Sorry to hear about your frustrations. I would suggest that you email our support team so that they can assist you further with these issues you are facing. Thank you!
Please! Give us global changes. Let us apply dropped shadows to all the photos in a book, for example, or change the offset and blur globally. At the moment each image has to be done individually.
Same applies to text settings. The default text is awful, but it slips back to the default with every carriage return. Frustrating.
Hi Peter, thank you for your feedback. We’ll most certainly inform the relevant parties on these limitations.