/ How-To
Crafts for Kiddos
By Colin on
Friday, 19th July |
Comments Off on Crafts for Kiddos
When it gets boring for the kids, finding activities for them to do can be a challenge. So, here are some clever suggestions for art and craft activities that require basic household items and even ones destined for the bin.
The activities will not only spell good times for the kids but will also allow them to tap into their creative inner selves, not to mention that their work will also be useful as a decoration or display of personnal pride..
We’ve put together a list of crafts that are extremely enjoyable to create and are sure to give the kids a sense of accomplishment. These crafts are quite easy to make, and only require recycled or inexpensive materials.

Photo taken from Kaboose
The value of recycling has got to be one of the reasons why making crafts is worthwhile. In this activity, the kids will create flower pots using their used plastic milk or juice bottles.
What you’ll need:
Plastic milk or juice bottles
Fabric or scrapbook paper scraps
Felt in coordinating colors
Scissors or a craft knife
Soil
White craft glue
Water
Bowl
Paintbrush
Potted flower
Cut the top off of the plastic jug, just under the handle.
Turn bottom of jug upside down and have an adult poke 4 small drain holes in the bottom.
Cut fabric or tear paper into 1” squares.
Mix2 partsglue and 1 part water in a bowl.
Paint glue mixture onto one side of the outside of the milk jug.
Decoupage the fabric or paper all over the sides of the jug, applying glue onto the jug first, then over the fabric or paper to adhere.
Cut 1.5” wide strips from felt, enough to go around the opening of the pot.
Glue the strip onto the lip of the pot, overlapping both sides, inside and out.
Add a handful of gravel or small rocks to the bottom of the pot.
Add a small amount of soil then add the potted flower.
Fill pot with soil, carefully but firmly patting down the soil around the flower.
Water your flower and place near a sunny window.
Idea from Kaboose.com

Photo taken from Kaboose
As it turns out, there are other usages for coffee filters than for preparing coffee. The kids can also utilize them to make their own butterfly impressions! Butterfly crafts made from coffee filters can make your home homier when you hang them from the ceiling or place them amongst indoor flowers.
Here what you need:
½ black chenille stem
Paper coffee filter
Water color paints
Paint brush
Water
Flatten the coffee filter and place it on a plate or newspaper, the paint and water will soak through. Set aside on paper towels to dry.
Fold the chenille stem in half. Remember, you are only using half of a chenille stem to begin with.
Fold the coffee filter accordion style, in about ½” pleats.
Position the pleated coffee filter into the bent end of the chenille stem. Center the filter at the bend.
Twist the chenille stem around the filter to secure it in place.
Bend the tips of the chenille stems over about ¼” to create the antennae.
Fan out the butterfly wings.
If desired, hang with yarn or fishing line.
Idea from Kaboose.com
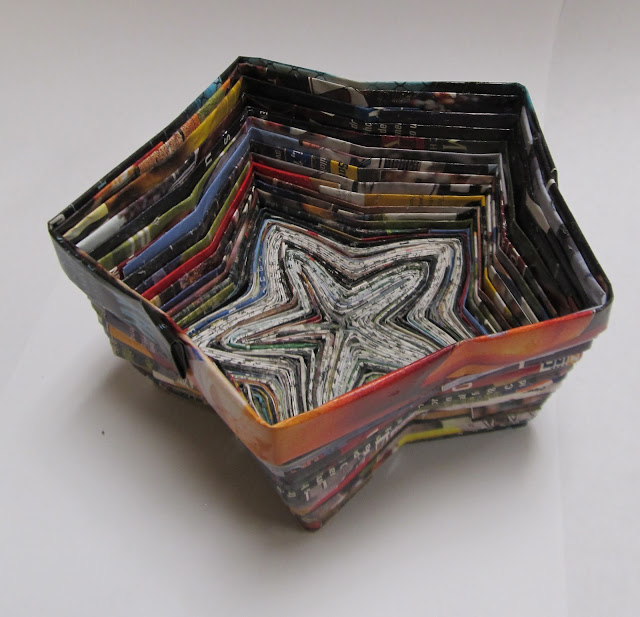
Taken from Art Teacher Creature
If you’re worried about your old magazines going to waste, don’t; there are a number of ways to creatively recycle them, one of which is creating “end of the year” magazine bowls. Due to their colorful nature, kids are sure to enjoy making them.
What to prepare:
Magazines
Craft glue in glue bottles
Mod Podge and paint brushes
Take the magazines and cut them up with a large paper cutter. Cut the pages in half long ways and left stacks of magazines on each student’s desk.
Take a strip of paper and fold it in half hot dog style. Open the paper and fold each side into the middle so that the edges line up with the center line. Repeat that step again and then fold it in half. Now you’ll have a neatly folded paper with an open end and a closed in, sort of like a tepee shape.
To start the actual bowl you start with the base. The shape of the bowl is determined by the shape of the base. The simplest shape is a circle, but you can do almost any shape if you get creative enough. You may create heart shapes, circle, square, tear drop and star shape. If you do the star shape you might need paper clips to hold the paper in place while its drying.
If you are doing a simple round bowl the start by putting craft glue along one side of a strip of folded paper. Then begin to tightly coil the paper around and around. It looks best to have the closed side of the paper pointing upward throughout the whole process.Once you get to the end of one piece just get another piece of magazine and continue where the last one ended.
Once you have your base created, its time to do the sides. To create the walls of the bowl is the same as creating the base except you allow the paper to stick up just a little bit each time higher than before.
Lastly, once the bowl is complete, do a coat of Mod Podge over the surface of the whole thing to make it harder and sturdier.
Idea from Art Teacher Creature
So, there you have it — a few easy and artful ways to keep little ones occupied! But the enjoyment doesn’t need to stop when the craft-making is done; be sure to take pictures of the kids’ finished works for memory. Snap away as they let their creative juices flow while working on them. The photos will come in handy in future when you want them to remember joyful hours.
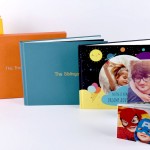
To make sure the photos will last, make a quality and equally lovely book of them. Get a Large Landscape Imagewrap at a 65% discount!
Happy craft-making to the kids, and happy photo book-making to you!